So, you read our guide on audio narration and are now thinking about recording your own voice-over, right? I’m sure it’ll be as easy as 1, 2, 3 — just head over to Costco, grab yourself the nearest $5 headset mic and it’s off to the races! How hard can it be to record quality audio content for your brand or venture? The “Rec” button’s right there, begging to be pushed!
But let’s not get ahead of ourselves! It turns out that recording is not as straightforward as it seems, and knowing the right voice-over tips can go a long way!
Luckily, you’ve got us in our corner to guide you through the recording process! We can guarantee these voice-over tips will be helpful whether you’re recording, producing or outsourcing your voice-overs!
If you prefer to watch a video instead, click here:
Some Voice-Over ABCs
Let’s review some of the basics. A voice-over is a production technique where a voice (which can be recorded or live) is overlaid over a presentation or some other form of media. You can hear voice-overs on TV, radio, as audio ads, in movies, video games, etc. There’s an abundance of media out there that use voice-overs in some form or another.
Companies and startups of all sizes have also turned to the immediacy of voice-overs as a way to reach their clients. Explainer videos and targeted ads use the human component of the voice as a way to bridge the gap and create empathy very quickly.
I’m all over this!
If you’re reading this, then you are probably already aware of the immense power of voice-overs. When used correctly, they’re very powerful sales and outreach tools. They grab attention immediately and have the potential to make your product or service look good.
But, we assume you’re mostly aware of these matters and want to join the action. We’re betting you’re also looking to handle matters competently because a bad voice-over will have the opposite effect. You’ll be wondering what happened to turn people off so quickly!
Quite a few subtle things factor into a voice-over being correct or not. They are not always related to authorial intent, or even to how smooth and silky your voice is.
Let’s dive in!
Have a script
Before you start thinking about any type of recording or production, it’s crucial to have a script in place that will get your point across in the least amount of time possible. Now, mind you, this does not necessarily mean that short is best, as that depends on your particular project. For example, it’s been well-established that the ideal length for an explainer video is around 2 minutes and then audience engagement drops off rapidly.
But it’s not just about length. Even having Laurence Olivier narrating your video would not net you more views if you’re dealing with an uninspired or lazy script. If you’re a script whiz or have someone who could leverage their talents in that way, that’s great! If not, you’ve also got the opportunity of considering a wide variety of outsourcing platforms to ensure that everything will hit that precise spot.
Let’s say you’re done with that and already have a wonderful script in your hands — no worries if you’re eco-friendly and don’t like printing, we try not to either — what’s next?
Ask yourself the following question…

Who’s doing the voice-over?
The outside talent route
That’s the first thing you should consider. If you’re hiring voice talent from an outsourcing agency, you’re already one problem down: you’ve selected a Pro, you know they’re already vetoed by the agency or outsourcing platform you’ve selected. You know their vocal style and competencies and you’re not going in blind.
Although it’s the most up-front expensive option, it’s also the safest; you know what you’re getting and you’re entitled to reasonable revisions and a certain minimum audio quality.
This is usually the safest, least time-consuming option. You know that, at the end of the day, you will be receiving a quality deliverable that passes even the most stringent audio regulations. That’s a load off your mind, right?
But let’s say you’re adventurous, or like the thrill and achievement of a DIY job well done!
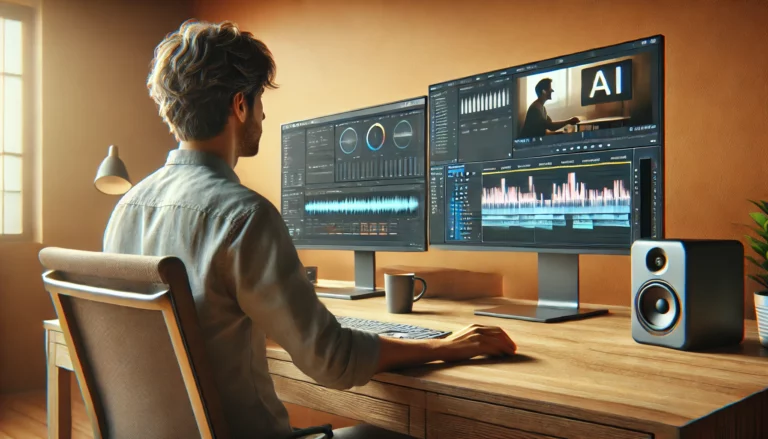
Recording or producing your content
Recording is more than just speaking into a microphone. You may want to explore your own voice-over potential or that of that intern that sounds kind of like James Earl Jones when they speak from the next room, but it’s important to follow certain guidelines. Sounding good means looking good, and that’s a desirable thing all-around.
So, what are some things to keep in mind?
Start with the mic
This may seem like a no-brainer, but it will save you plenty of trouble later on. Investing in a good-quality mic means you will already have basically have the job done; bad mics tend to destroy audio quality, they distort the qualities of the voice and they tend to take in room tone (the sound of the empty room) in excess, or not enough up to a point the recordings sound unnatural. Not to mention crackles, pops and other quibbles that, when added up, make for a very unpleasant listening experience.
Not just that, hearing a good quality, well-acted clip is an excellent way to know your audience you mean business and you didn’t record your audio on your phone while having your first cup of morning Joe.
We recommend going with a simple cardioid, condenser mic, and a sound card to plug them in. If you’re thinking about something more modest, the Blue Yeti USB microphone can be plugged directly into your computer and makes for an excellent home recording choice. Many YouTubers swear by it. It’s a great budget-friendly choice, at around $110-120. With a proper mic stand, you can record like nobody’s business.
In short, quality means you care for your audience. But good gear is not where the quality train stops!
The software
Your recording software is going to act as your personal recording and mixing console. Although programs like Audacity (the free, open-source choice), Pro Tools or Adobe Audition are easy and intuitive enough to use for just recording isolated voice tracks, there’s a dizzying array of editing and mixing options available to those willing to go deep.
There’s an immense amount to dig into if you want to sink your teeth in — you choose where the buck stops!
Mostly, you’re probably going to be recording and editing tracks together into one cohesive whole. You’re also going to be controlling and editing sound levels and ensuring that your microphone is not picking up too many extraneous sounds. When recording you want to keep a nice, even tone that’s not interrupted by things like car horns, noisy neighbors or other nuisances.
Some voice-over audio guidelines
If you’re good enough at setting your mic’s sensitivity, it will just pick up your voice even if it’s (relatively) busy outside.
It’s generally recommended by Amazon’s Guidelines, for example, to keep maximum noise levels under -60db (decibels). Microphone loudness is usually suggested at levels between -18RMS to -23 RMS. Going with our previous point and getting a nice microphone with adequate sensitivity will save you a world of trouble. Mics without enough sensitivity will pick up foreign sounds and make your voice sound distorted.
Having acceptable sound levels, while difficult at first without proper audio training, will also ensure that your files pass most platform’s standards. If it’s good enough for Amazon and YouTube, it’s generally good enough to publish.
This leads us to the next point:
The recording environment
It’s very important to think carefully about the environment you’re going to be producing your voice content in. Unless you own a studio or are already going with a voice Pro, you generally want to keep expenditures reasonable and these tips in mind.
- Try to find a room that’s not too small and has decent acoustics. In this case, bigger is better. (Unless it’s big enough where echo becomes a big issue. More on that below.)
- Be mindful of surrounding noise levels. Try to find a room where outside interferences like wind, rain, cars, shouting, etc. are kept to a minimum.
- Always go with hard floors. Carpets tend to mess up acoustics. Also remember to clear the room out, and remove sources of vibration.
A little info on soundproofing
If you’re not going with a studio, you’re generally going to want to give the room some treatment. This helps avoid the room’s natural sound influencing your recordings too much. Sound is naturally reflected off surfaces after it is emitted, creating something called reverberation, or reverb. Since every room has its own acoustic profile (and things, which sound bounces off of, placed differently), that’s why it’s best to eliminate natural reverb. Post-production edits can be done to add great-sounding digital, so insulating the room and emptying it out is often a necessity.
This can be done with as much diligence as purchasing and installing different types of acoustic panels (the foamy material you see coating walls in recording studios), or with inexpensive, DIY methods.
People have gotten away with recording inside of closets or small rooms insulated with linen. You’ll know you’ve hit the sweet spots when your chosen program is telling you noise levels are down to acceptable levels.
Ready to record? Remember:
Prepare your voice
When taking voice-over tips into account, keeping the voice in shape is paramount. If you’re thinking about heading into a recording session without having learned basic voice-over technique, we recommend you stop and take the time to learn some simple warm-ups! You may already have a good, resonant voice that you’re confident about using, but not maintaining proper vocal technique throughout a long multi-hour recording session could start grinding down your vocal cords. It’s best to know about the basics before you go in to maximize your performance and help your voice last.
One of our crucial voice-over tips is to maintain proper hydration. Stop and have a few sips of water from time to time. Remember that it’s best to avoid cold liquids as they could have a detrimental effect on your vocal cords. In some cases, having warm coffee or tea with ginger can help fight off hoarseness. Remember not to go too hot, either, because that can lead to irritation!
Also keep in mind that, although it’s advised to breathe normally and in a relaxed manner. Sounds like breathing and licking your lips should not be heard in a professional recording; they count as extraneous and should either be eliminated in post-production or avoided entirely when recording. Try to avoid keep your mouth too close to the mic to avoid edits later!
Some final voice-over tips on sounds and editing
Most likely you’re going to have to make an audio file using the best takes possible. That means eliminating annoying sounds like breathing, mouth licking or mouse clicks. The latter can be avoided by setting your “record” button for a delayed start. This can be as many seconds or “beats” as you need. That will prevent you from having to go over the whole mix with a fine-tooth comb trying to identify when “start” and “stop” mouse clicks are taking place.
If you have to repeat a take or make a mistake, we also recommend the “clap method”. Since the recording can be shown as a wavelength, making a loud clap with both hands can serve as a marker. It will let you know you have something to edit out there. The clapping mark will look like a very clear spike in the recording, helping you delete bad takes and keep the good stuff.
Wrapping up
Recording voice-overs can be a very rewarding process when done right. We hope to have set you on the right path with these voice-over tips. By not having to learn these tips on the go, we’ve hopefully saved you a ton of grief and trial-and-error. Avoid getting your projects delayed by weeks or months! With these tips, you’ll never get your deliverables returned for re-recording without any notice on what went wrong.
Now it’s finally time to hit that REC button and get this show started!
Get your voice over today at Bunny Studio.