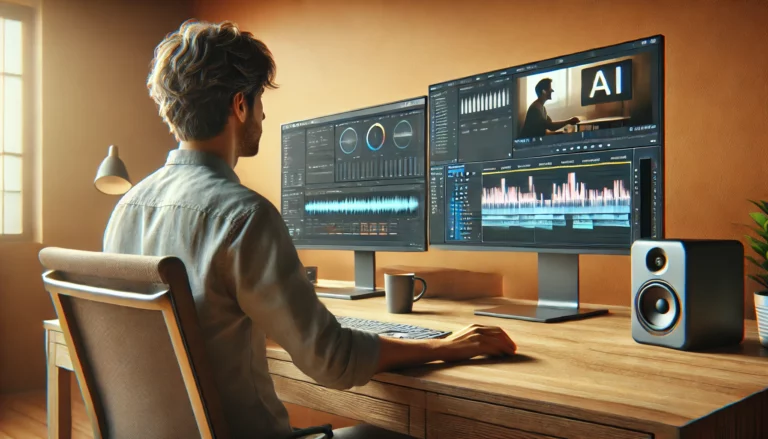
Sometimes also called a sound isolation enclosure or a sound booth, a whisper room is a sound-proofed area used to dampen ambient noise. Recording studios, freelance voice professionals, and TV studios use whisper rooms so that no background noise can sneak in and pollute an otherwise great recording. Whisper rooms also reduce acoustic noise, so recordings come out sounding clear and crisp, with no echoes or reverberations that would affect sound quality.
But if you prefer to watch a video instead, click here:
This post was updated on March 2021
How is a whisper room constructed?
Materials
A whisper room, whether it’s a small, one-person booth or a full-sized soundproofed room, is generally constructed of a wooden frame packed with sound insulating material. Fiberglass is a popular option if the inside of the booth is lined with drywall. If not, whisper rooms tend to be lined with soft foam wedge paneling or similar thick, sound-absorbing materials. Any cracks in the insulation, such as those around a door in its frame, can be blocked with weather stripping that further prevents sounds from entering the room.
Size
The smallest sound-dampening device that qualifies as an actual whisper room is essentially a rectangular box that you can place your microphone inside as you make your audio recording. It looks something like this.
Whisper rooms can be anywhere from that size all the way up to an entire recording studio with multiple sound-dampened rooms that an entire recording team can comfortably fit inside.
Location
Portable sound isolation enclosures, by default, can be placed almost anywhere you might need to reduce acoustic and background noise as you make a recording. These portable setups are ideal for traveling podcasters or journalists who need to be able to record clips as they are on the move.
Ideally, however, you should ideally place sound booths in areas that already benefit from a low level of background and acoustic noise interference. This is because, while whisper rooms are great at reducing noise pollution, they often do not eliminate it entirely. So, if you are installing a booth in your home, for example, you can maximize its effectiveness by putting it as far away from the garage or children’s rooms as possible.
Ventilation
Remember, you need to seal all gaps to prevent sound from leaking in, which means air cannot leak in, either. If you plan to spend more than a few minutes making a recording in the small, enclosed space of your sound booth, definitely make sure to purchase (or build) a model with proper air circulation and ventilation.

Do I need a whisper room?
If you produce any audio content that will be made public to listeners, it is a good idea to use a whisper room during recording.
Even if you don’t plan on recording and publishing your work for an audience, you may still enjoy having a quiet place to practice and hone your craft. Whisper Room Inc., a manufacturer of sound isolation enclosures, claims their products are used and enjoyed by:
- TV networks
- Recording studios
- Educational institutions
- Federal and state governments
- Medical laboratories
- Musicians
A few of the applications they recommend using their products for include:
- Recording music
- Voiceovers
- Simultaneous interpretation
- Broadcasts
- Musical instrument practice
- Medical testing
- Audiology testing
Some additional careers and hobbies that frequently benefit from sound booths are:
- Podcasters
- YouTube personalities
- Twitch and other gaming streamers
- Music teachers
- Independent video journalists
- Freelance voice actors
- Actors recording audition tapes from home
However, even if you work outside of all of those fields, you may still benefit from using a whisper room. After all, the fundamental idea of a sound booth is to improve audio quality. So, if you work in a field or enjoy a hobby that would benefit from greater sound quality, you might want to look into a sound isolation booth for your own use.
Can I build my own whisper room, as opposed to buying a pre-made one?
The answer to this question will vary based on your personal situation and needs.
If you have a career or hobby that requires great sound quality for recording purposes, you likely already have rented a studio or have a room in your house dedicated to that purpose.
Building a sound-proof booth in a corner of a room or sound-proofing an entire room are both viable options for the intrepid do-it-yourself craftsperson. If you aren’t intimidated by the thought of completing the following DIY projects, then building your own whisper room would probably be a good choice. You can shop around for the quality of soundproofing materials you require, you can customize your level of soundproofing, and you can save money on labor by purchasing the materials and putting them together on your own.
How to build a sound booth
First, you will want to map out a corner of the room where your booth will be located. Take measurements from floor to ceiling, and measurements of how wide and deep you’d like your booth to be.
When deciding on the dimensions of your whisper room booth, keep the following in mind:
- Will you be standing in the booth by yourself?
- Do you prefer to sit instead of stand? If so, the booth will need to be large enough to accommodate a comfortable chair or stool.
- Will others join you in the booth? For example, if you plan on inviting guest speakers on your podcast who will be recording with you simultaneously, you will need to make sure you can all fit comfortably.
- How much space does your recording equipment take up within the booth?
- Does your recording equipment stand alone, or will you need to fit a small table in the booth to hold your microphone, laptop, or other supplies?
- How thick will the sound insulation be? Remember that thick soundproofing materials will take up more space than you might expect.
Once you have a thorough idea of how big you will need to make your whisper room booth, you can purchase the materials.
You will need:
- Lumber to frame the walls of your booth
- Fiberglass padding or other sound dampening material to pack the walls
- Drywall to separate you from the fiberglass
- Weather stripping to seal up gaps for maximum soundproofing
- Materials to make a door
Once you have acquired the necessary materials, follow these steps to assemble the booth according to your planned dimensions.

How to sound-proof a whole room
Sound-proofing an entire room can be easier than building a booth, because there is no need to assemble a frame and hang drywall unless you need absolutely perfect sound quality. However, before you take the plunge to hang soundproofing in your house, remember that you are losing an entire room of your home to the purpose of having a quiet place to record. If you’re prepared to dedicate a room to this purpose and have no qualms about the aesthetics of hanging soundproofing foam on all surfaces, go for it!
Also, if you do need absolutely perfect sound quality, the process of soundproofing a room becomes more complicated. Essentially, for this method, you would want to build a frame just like in the steps for a smaller booth, only you’ll need to make them large enough to cover the entire wall surface in your room. From there, you can pack it with fiberglass, hang drywall, and seal any cracks just like you would in the above steps.
For most purposes, however, you can get away with simpler solutions that don’t require such an intense commitment.
You will need to decide which of the following soundproof materials best fits your needs, and buy enough to cover the entire room:
- Acoustic panelin
- Sound absorption sheets
- Acoustic ceiling tiles
- Wedge foam tiles
- And/or, sound deadening sheeting
From there, you just need to adhere to your material of choice.
Are there alternative solutions other than installing a full-size whisper room?
Sound booths, even the smaller rectangular ones that are intended to be portable, often take up a great deal of space in a room. In addition, the cost of such a setup can range from a few hundred dollars for mediocre soundproofing, all the way up to several thousand dollars for the high-end, professional quality choices.
If creating high-quality audio recordings forms the backbone of your career, invest in a professional sound booth. This is the best way to guarantee your listeners will have the best sound quality available.
However, if you are a hobbyist, or if you are in the process of building up an income stream from your audio content, you might want to explore a few of the more casual options before you decide to splurge.
In exchange for lower sound quality and a lesser ability to dampen noise interference, you can find acoustic boxes and walls for a comparatively tiny price tag.
While these lower-cost options may not be as effective as their professional counterparts, they should still get the job done while you’re busy getting your podcast or music career off the ground.
Remember, you can and should always update your recording studio and equipment as your content begins to pick up steam and you have some cash flow to reinvest in the project.
Related topics
If you’re just getting started as an audio content producer and you would like to discover more about earning money for your work, check out this informative post on monetizing podcasts.